Welcome to the first post in the series: How (not) to build an observatory, where I’ll be going through the process of how the Wonky Wanderer was built, and what mistakes to avoid should you ever wish to build your own.
So, how do you build an observatory? Where do you even start? Is it hard? Well, let’s dive in and start answering some of these questions! (Spoiler alert: yes it’s hard, if you do it wrong, like me)
Where do you even start?
For now we’re going to assume that you’re a big astro-nerd. You’ve got a telescope, setup for either visual or imaging, and you want a permanent setup for your equipment. Great. Next step, what kind of observatory are you after? And will it work with where you want to put it? Generally there are two main types of observatories:
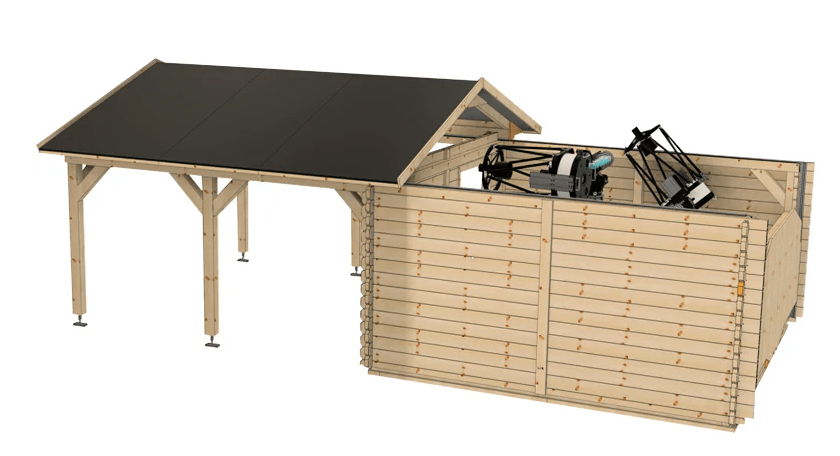
This here is a Roll-Off-Roof Observatory from Greenline (credit to Testar, where you can view the product here). Roll off roof observatories are a straight forward design, generally cheaper to buy or make, with less moving parts and more space to work on your telescope. When you’re ready to start your session you can roll the roof off, either manually or automatically depending on your setup, and roll it back when you’re done. Simple right? They are a very popular design, given their ease of use, and they are especially handy if you want to house more than one telescope. Their main drawback is the view you get, as typically you wont get sightlines down to the horizon, restricting you to targets higher in the sky. This might not be a problem for you as either you’re happy with the trade off, or perhaps the location you want your observatory has a lot of trees or houses that already restrict your views. Some of these shortcomings can be overcome with other mechanisms, but we won’t cover that here. Their second drawback is the space they take up, as you effectively need twice the size of the observatory footprint to have room for the roof mechanism.

Next up is the classic Dome Observatory, this one is from ScopeDome (credit to Sidereal Trading, where you can view the product here). Dome observatories provide you with great sky coverage, and good protection against the wind, require less space than a roll off roof, and they just look much cooler. However they tend to be more complicated, as not only do you need to drive the dome around a ring but you also need to count how far it’s moved, have a separate mechanism for the shutter, figure out how to control and power the shutter when it’s separated from the body, and so on. They are also more expensive to build or buy.
In my case, I picked the dome. Why? I had access to a patch of land with full views down to most of the horizon, and being so open the area is a little more prone to wind. I also decided to build instead of buy because there’s no way I could afford a pre-made dome. Also, again, domes are just cooler.
Inspiration strikes
While I was pondering about the idea of building an observatory, I decided to have a wander around at the family farm. Maybe see if there was any scrap metal or anything I could use to make a start. And then I found it, my inspiration, yet also my first mistake: a stock drip

Mmmm, rusty
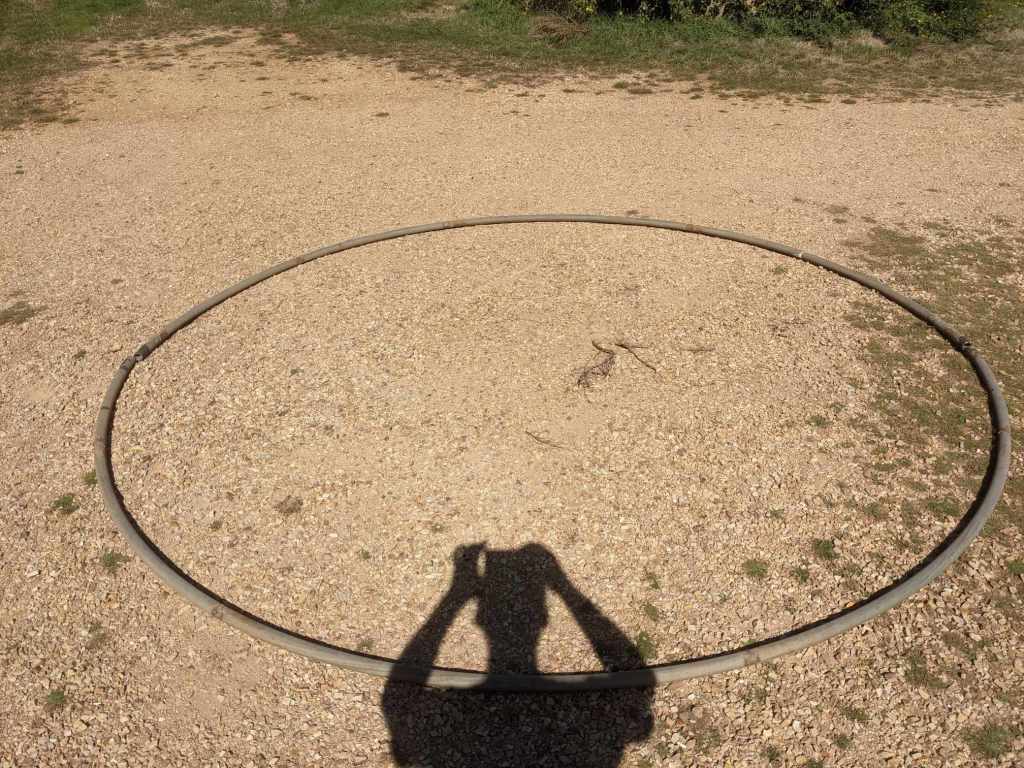
It seemed perfect. Not the structure itself, or the pipes full of god only knows what, but that top ring. It was about 3 metres in diameter, which seemed ideal. After all, to build a the dome I’d need to start with a ring, and build up from there, right? So I got to work

Not bad, but we should probably remove those connectors and weld it together later
Better. Although it’s not exactly circular is it? It’s a little…wonky.
With the ring secured, it was time to weld the two pieces together. After getting my brother to weld the two pieces together we thought we could fix the shape a bit, as removing the fixings made it slightly oblong. How? Well…unfortunately I didn’t take video of this next part of the process, but imagine if you will a pine fence post, a ute with a bull bar, and this big metal ring getting squeezed between the two. It certainly wasn’t the most high tech solution, but here’s the result, alongside the start of the top of the frame

Not bad…if you don’t look too close…
Driving it
So, with the ring welded and, er, rounded, the next step was figuring out how to drive it, centre it, and secure it. For driving it the two options seemed to be using a motor connected to a rubber wheel that would push the ring along, or a gear pushing some teeth. Given the weight of the ring, and that more weight was yet to be added, using a gear and teeth seemed like it would provide the most consistent and reliable force to drive the ring around. Then the “easiest” way to add a gear and teeth to the setup would be to spot-weld some chain around the inside, and spring mount a motor with a gear. After that we just need some kind of rollers to hold the ring up, secure it, and keep it centred. Given that it’s best to keep all of the mechanisms inside the dome, to protect it from the weather, and that the motor would already be pushing the ring from the inside, I figured I could use rollers to keep the ring centred as it rotates. I drew up some nifty MS Paint diagrams, like all the pros do of course, to visualise my idea
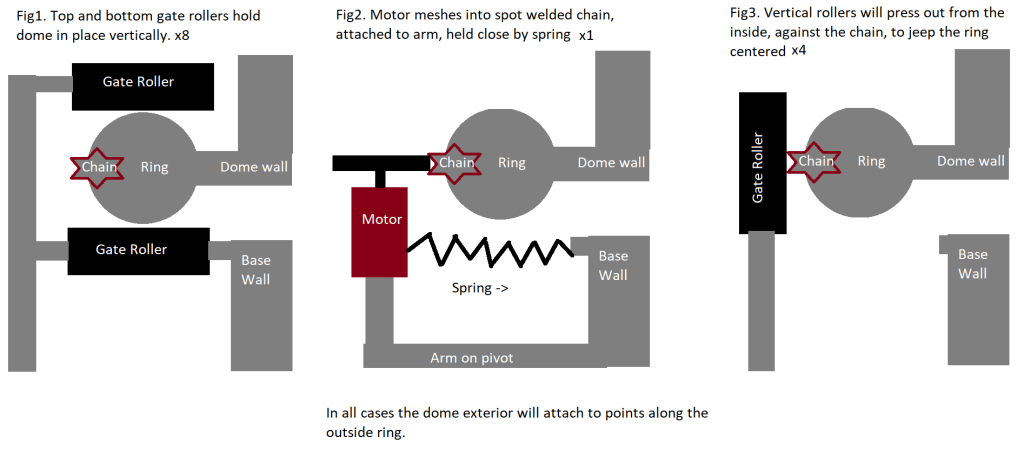
Seems pretty straight forward? Well…kinda. That could be a lot of weight, and typically gate rollers aren’t designed to hold things at a right angle. After browsing many a hardware store aisle, and searching online for a lot of hours, I finally came across pallet jack wheels. These are chonky, sturdy, and each one can carry about 300kg. They seemed perfect.
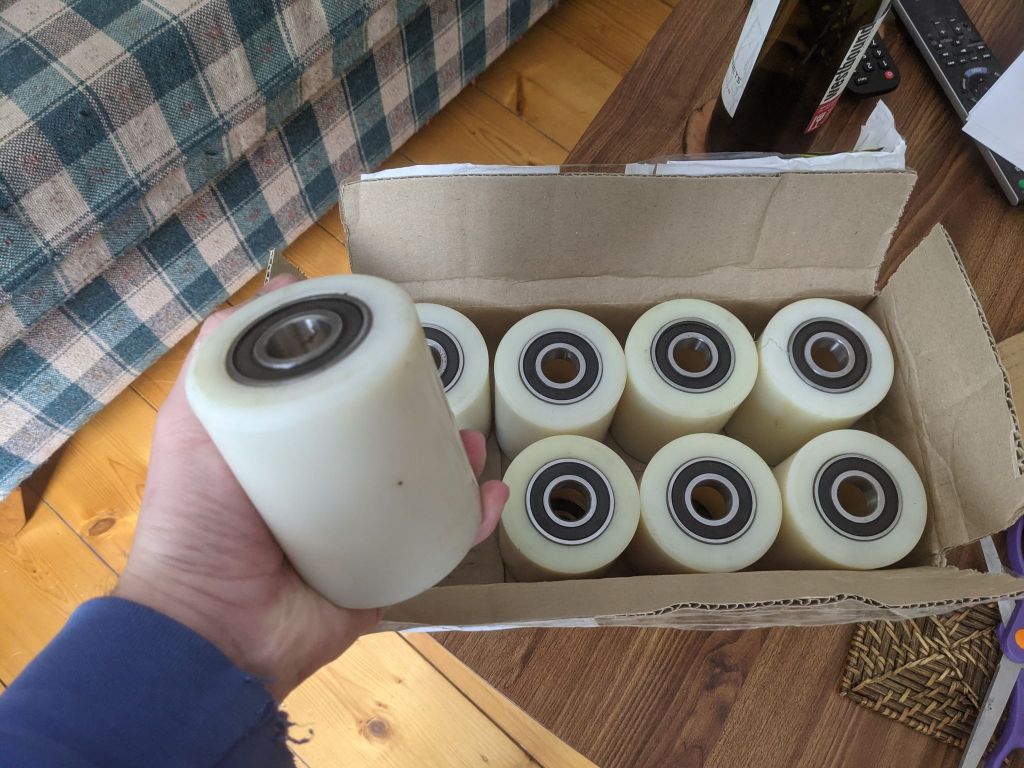
They look practically invincible
With the rollers secured it was time to build some brackets. For this I cut some steel strap, used a hydraulic press with an angle attachment, and slid in an M20 bolt to secure it. Viola!
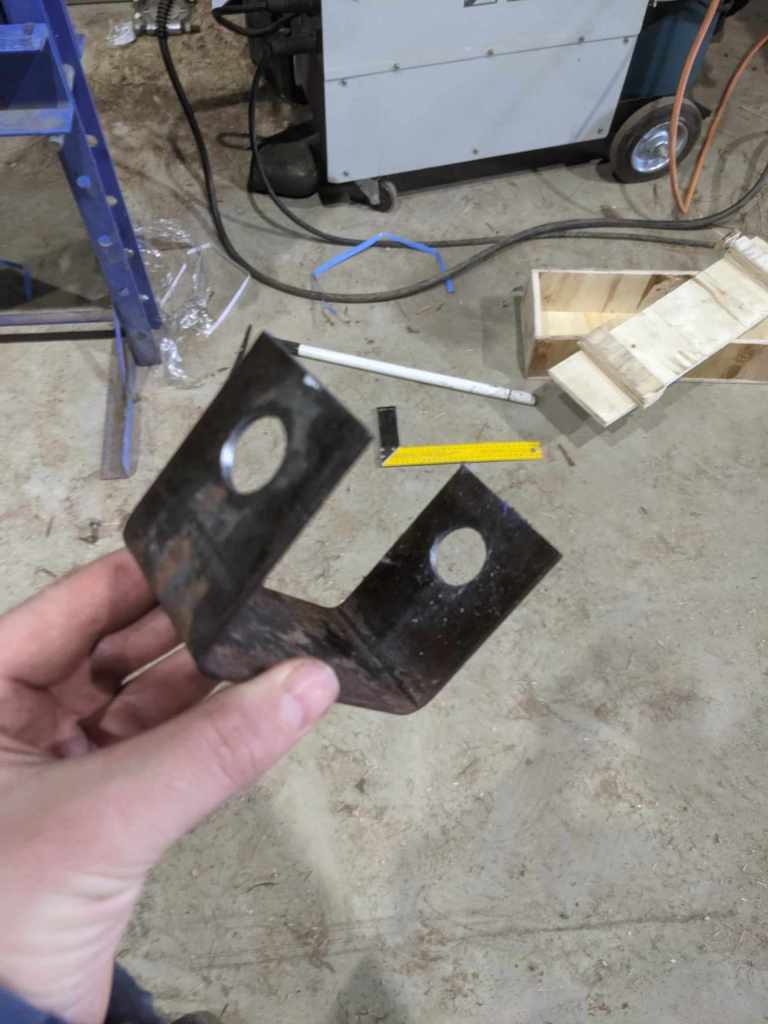
Almost looks legit

Not the straightest bracket in the world, but nothing some welding can’t secure
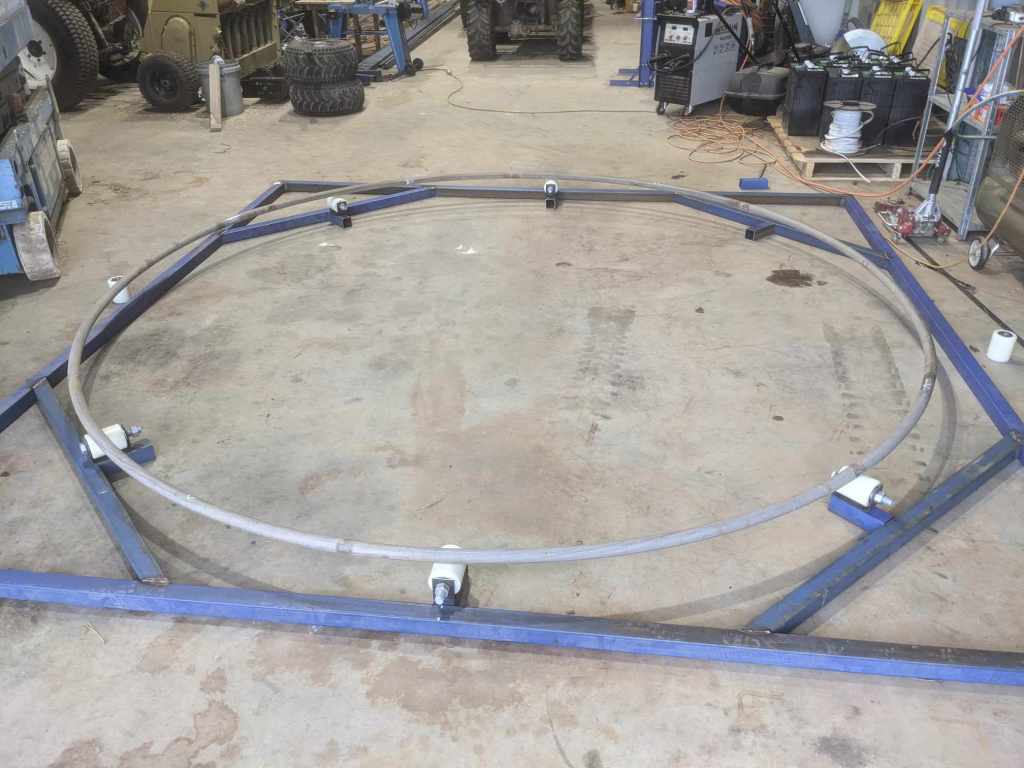
We secured a few brackets to the frame and the mechanism started coming together
Driving it
Finally, it was time to get the ring rotating, which involved two parts. The first was welding some chain to the inside of the ring, and the second was mounting the motor somewhere. Step one was definitely the most gruelling…for my brother, who bravely sacrificed his knees and shoulders while spot welding the chain to the inside. In an effort to keep each link the same height we positioned a wooden block against the ring, supporting the chain, and rotated the ring every few links
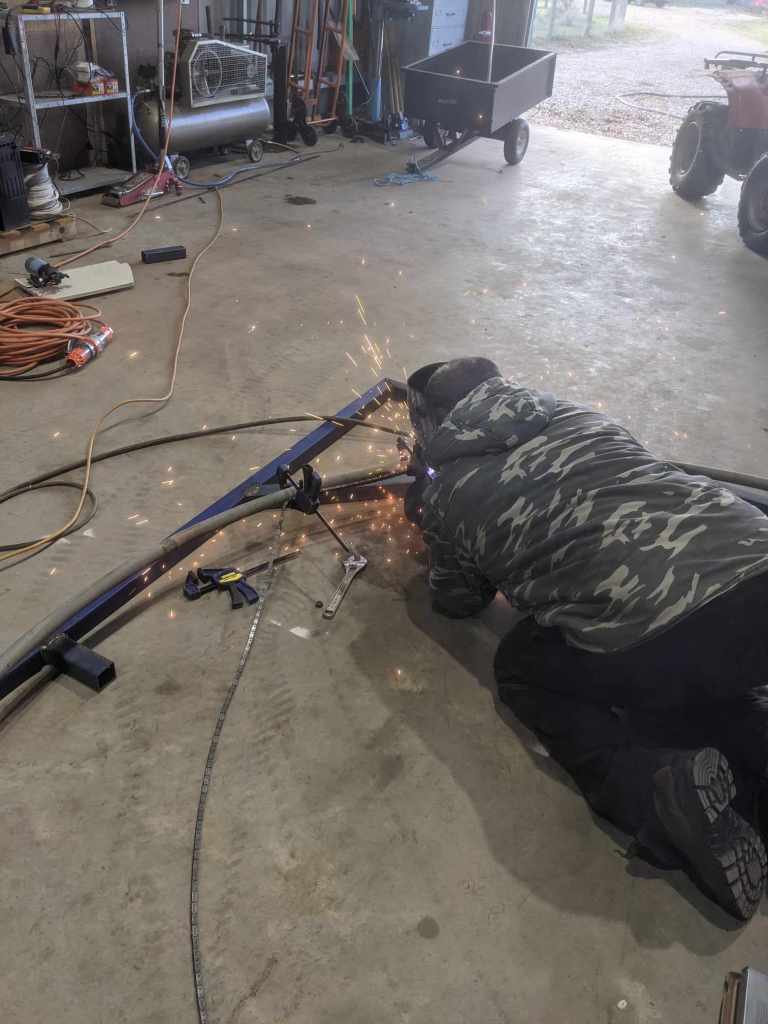
So brave
This worked pretty well, and we were finally able to test with a motor. For this next part I purchased a motor from a local DC motor supplier, on recommendation from a friend. That recommendation being “They sell motors that can spit roast an entire cow, so it should be strong enough for an observatory” and you better believe he was right (Thanks Ash!)
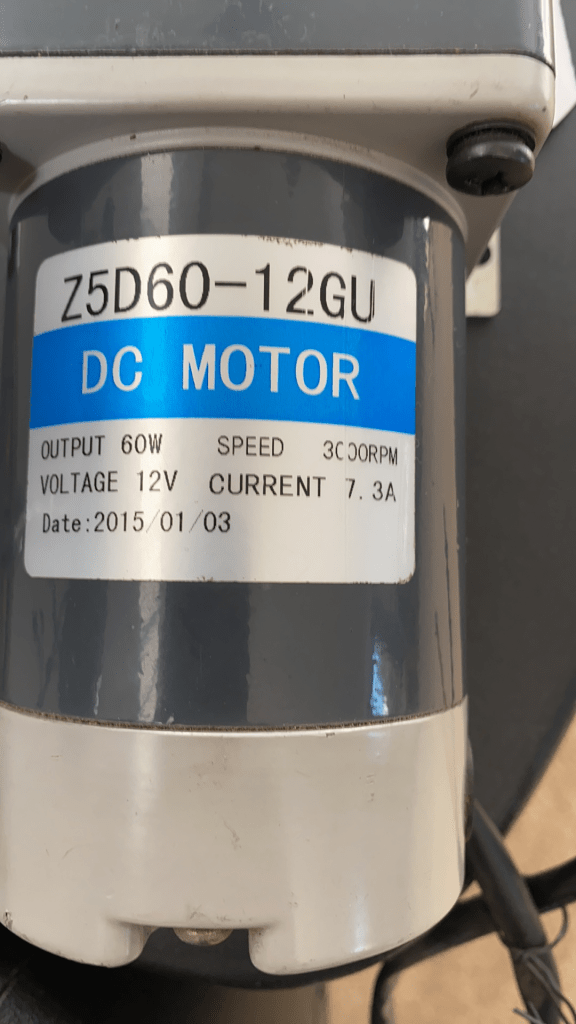
A heavy boi
With the motor obtained, and a gear attached, it seemed like the appropriate time to give the mechanism a test by holding the motor with my hands, like all good professionals

So strong
Success! Or at least, kind of. It turned out that despite our best efforts the ring was a little misshapen. Not just horizontally, but it also had some variance vertically as well (I guess 50 year old stock drips didn’t have such strict requirements). This meant that we couldn’t just use a spring on the horizontal axis to follow the chain, we needed to have a spring on the vertical axis as well. Luckily my brother came up with quite a genius approach: We could mount the motor on a sort of “floating cage”, where the motor could slide up and down, and back and fourth, on rails supported by springs, and a hinge supporting it from the bottom. These rails were also threaded, allowing the tension of the spring to be adjusted, and it certainly worked a treat!
The top threads and springs came later, but use your imagination for now
And that was it! Obviously a few improvements and adjustments would be made over time, but end the end we were able to rotate a ring that was durable, able to drive a large load, and had enough tolerance to make it reliable.
Oh hey, it’s me
Lessons Learned
When I decided to write this series I wanted to not only show how I built my home observatory, but also the things that I’d change if I were to do it all over again, so that hopefully you can make better decisions than I did. Each one of these posts will come with a list of what worked, what didn’t, and what could be improved on. So here we go!
- The ring: This was the first big mistake. In an effort to cut costs it seemed like a good idea to use some scrap metal. But given that we had to cut it, weld it, and shape it, with the end result still being somewhat crooked, it probably wasn’t worth the cost savings. In addition, the fact that it’s a circular pipe made welding the chain difficult, and later on made welding supports to it a pain.
If I were to do this again I’d get some angle steel rolled in two pieces by a professional, weld them, then run the chain tucked up in the corner of the steel for accuracy. - The 300 kg rollers: They were probably overkill given their size, but not the worst idea as the shape of the ring did need more tolerance in the end.
If I was going to change to ring to angle steel then I’d probably find smaller rollers, ones capable of fitting snugly into the angle steel. I’d also run then more frequently so that the ring is better supported and resistant to warping. - The motor and chain: Would absolutely use this approach again. It’s a relatively simple mechanism for driving the ring, and later on using teeth will prove valuable when using an encoder to track the ring’s rotation.
- The motor cage: It was a great idea, and has worked incredibly well. I would do it again if there were intolerances I needed to deal with. Ideally though you’d only need the spring to hold pressure against the chain, and not to float the motor up and down as well.
- The roller placement: I would actually place the rollers like this again. That being rollers on the top, bottom, and pushing out to keep the ring centred. I believe it’s a decent approach to keeping the hardware on the inside of the observatory while being shielded from the elements.
And that’s it! I hope you enjoyed the first part in this series. A special thanks as well to my brother Callum for all his help with welding and construction, and to Ash for his recommendations and feedback. In part 2 we’ll look at how the dome itself was constructed, and the many mistakes I made there as well. Until then, clear skies!
Stay tuned!

Leave a comment